当后台在进行某些长时间的操作时,如果能在页面上提供一个显示真实进度的进度条,而不是让用户不知情的等待或是从前的那些简单的估计,将是一个非常难得的出彩之处。现在使用ASP.NET Atlas完全有可能做到这些。这篇文章将讨论如何完成这一功能并介绍一些有关Atlas客户端控件开发的基本概念。您同时可以。
实现网页上的进度条想法其实很简单:编写一个客户端的Atlas控件,每隔一段时间请求一次服务器,并使用返回的当前进度数据更新进度条的显示。在这个示例中,将有四个部分的代码组成:
- 一个需要较长时间才能完成的Web Service
- 一个用来查询上述Web Service进度的Web Service
- 客户端Atlas进度条(ProgressBar)控件,负责维护客户端逻辑并输出可视化UI。这也是本示例中最重要的一个组件,在将来可被重用于其他页面或程序的开发
- 包含上述Web Service以及控件的ASP.NET测试页面
下面我们一步一步地来实现以上四个步骤:
需要较长时间完成的Web Service
在实际的程序中,一个需要较长时间完成的Web Service可能有如下声明:
 [WebMethod] 2 public void TimeConsumingTask() 3

 { 4
{ 4 ConnectToDataBase();5 GetSomeValueFromDataBase();6 CopySomeFilesFromDisk();7 GetARemoteFile();8
 }
} 这样我们就可以插入一些辅助方法来确定当前进度完成情况,setProgress(int)用来设定当前的进度完成百分比:
[WebMethod] 2 public void TimeConsumingTask() 3 { 4 setProgress(0); 5 ConnectToDataBase(); 6 setProgress(10); 7 GetSomeValueFromDataBase(); 8 setProgress(40); 9 CopySomeFilesFromDisk();10 setProgress(50);11 GetARemoteFile();12 setProgress(100);13} 在本示例中,我们仅仅使用Cache来储存进度完成信息并利用Thread.Sleep()方法模拟操作的延迟:
[WebMethod] 2 public int StartTimeConsumingTask() 3 { 4 string processKey = this.Context.Request.UserHostAddress; 5 string threadLockKey = "thread" + this.Context.Request.UserHostAddress; 6 object threadLock = this.Context.Cache[threadLockKey]; 7 if (threadLock == null) 8
 { 9 threadLock = new object();10 this.Context.Cache[threadLockKey] = threadLock;11
 }1213 // Only allow 1 running task per user.14 if (!Monitor.TryEnter(threadLock, 0))15 return -1;1617 DateTime startTime = DateTime.Now;1819 // Simulate a time-consuming task.20 for (int i = 1; i <= 100; i++)21 { 22 // Update the progress for this task.23 this.Context.Cache[processKey] = i;24 Thread.Sleep(70);25 }2627 Monitor.Exit(threadLock);2829 return (DateTime.Now - startTime).Seconds;30} 31
查询进度的Web Service
很容易实现,只需从Cache中取得进度信息:
[WebMethod] 2 public int GetProgress() 3 { 4 string processKey = this.Context.Request.UserHostAddress; 5 object progress = this.Context.Cache[processKey]; 6 if (progress != null) 7 { 8 return (int)progress; 9 }1011 return 0;12}
客户端进度条(ProgressBar)控件
第一步:从Sys.UI.Control继承
ProgressBar控件应该继承自Atlas的控件基类Sys.UI.Control,并且声明为密封类(sealed class,不能再被继承)。Sys.UI.Control基类包含了一些所有的控件共有的操作与方法。比如,将自己与某个HTML元素关联起来(也就是所谓的binding)等。同时也要注册以让Atlas了解这个新的类型以便今后的声明及使用,例如,让Atlas可以取得这个类型的描述等。
Sys.UI.ProgressBar = function (associatedElement) { 2 Sys.UI.ProgressBar.initializeBase(this, [associatedElement]);34} 5 Type.registerSealedClass('Sys.UI.ProgressBar', Sys.UI.Control); 6 Sys.TypeDescriptor.addType('script','progressBar', Sys.UI.ProgressBar); 7
第二步:添加私有成员并书写相应的Setter/Getter
下面需要添加一些属性用来设定我们的控件。在这个例子中,我们需要三个属性:
- Interval. 每次重新查询进度并更新进度条的间隔时间。单位:毫秒
- Service Url. Web Service文件的路径。
- Service Method. 取得进度信息的方法名。
这些属性应该严格遵守Atlas的命名规范:Getter应该以'get_'开头,Setter应该以'set_'开头并传入一个参数。还需要在控件的描述方法(descriptor)中添加对于这些属性的说明。有关描述方法(descriptor)将在第四步中说明。例如,针对Service Method属性,我们有如下声明:
var _serviceMethod; 2 3 this .get_serviceMethod = function () { 4 return _serviceMethod;5} 6 7 this .set_serviceMethod = function (value) { 8 _serviceMethod = value;9}
第三步:使用Timer控件每隔一段时间查询一次Web Service
Sys.Timer用于每过一段时间调用一个方法(发出一个事件),我们可以定义一个委托来指向这个方法,并在并在每一个时间段内查询这个Web Service。为了避免浏览器内存泄露,在控件析构(dispose)的时候应该记得做一些必要的清理。
还有,注意当前一个请求并没有返回时,不应该发送第二个请求。
var _timer = new Sys.Timer(); 2 var _responsePending; 3 var _tickHandler; 4 var _obj = this ; 5 6 this .initialize = function () { 7 Sys.UI.ProgressBar.callBaseMethod(this, 'initialize'); 8 _tickHandler = Function.createDelegate(this, this._onTimerTick); 9 _timer.tick.add(_tickHandler);10 this.set_progress(0);11} 12 13 this .dispose = function () { 14 if (_timer) { 15 _timer.tick.remove(_tickHandler);16 _tickHandler = null;17 _timer.dispose();18 }19 _timer = null;20 associatedElement = null;21 _obj = null;2223 Sys.UI.ProgressBar.callBaseMethod(this, 'dispose');24} 25 26 this ._onTimerTick = function (sender, eventArgs) { 27 if (!_responsePending) { 28 _responsePending = true;29 30 // Asynchronously call the service method.31 Sys.Net.ServiceMethod.invoke(_serviceURL, _serviceMethod, null, null, _onMethodComplete);32 }33} 34 35 function _onMethodComplete(result) { 36 // Update the progress bar.37 _obj.set_progress(result);38 _responsePending = false;39}
第四步:添加控制方法
我们应该可以控制进度条的开始/停止。并且,对于一个Atlas控件,相关的描述方法(descriptor)也是必须的。Atlas会利用它来描述这个类型的信息。
this .getDescriptor = function () { 2 var td = Sys.UI.ProgressBar.callBaseMethod(this, 'getDescriptor'); 3 td.addProperty('interval', Number); 4 td.addProperty('progress', Number); 5 td.addProperty('serviceURL', String); 6 td.addProperty('serviceMethod', String); 7 td.addMethod('start'); 8 td.addMethod('stop'); 9 return td;10} 11 12 this .start = function () { 13 _timer.set_enabled(true);14} 15 16 this .stop = function () { 17 _timer.set_enabled(false);18}
OK,目前为止客户端的控件就完成了。我们把它存为ProgressBar.js。
ASP.NET Testing Page ASP.NET测试页面
对于任何的Atlas页面,我们第一件需要做的事情就是添加一个ScriptManager服务器控件。在这个示例中我们将引用ProgressBar控件,较长时间才能完成的Web Service以及进度查询Web Service。(这两个Web Service位于同一个文件中:TaskService.asmx)
< atlas:ScriptManager ID ="ScriptManager1" runat ="server" > 2 < Scripts > 3 < atlas:ScriptReference Path ="ScriptLibrary/ProgressBar.js" ScriptName ="Custom" /> 4 </ Scripts > 5 < Services > 6 < atlas:ServiceReference Path ="TaskService.asmx" /> 7 </ Services > 8 </ atlas:ScriptManager > 接下来是页面的布局与样式:
< style type ="text/css" > 2* { }{ 3 font-family: tahoma; 4} 5.progressBarContainer { }{ 6 border: 1px solid #000; 7 width: 500px; 8 height: 15px; 9}10.progressBar { }{ 11 background-color: green;12 height: 15px;13 width: 0px;14 font-weight: bold;15}16 </ style > 17 18 < div > Task Progress </ div > 19 < div class ="progressBarContainer" > 20 < div id ="pb" class ="progressBar" ></ div > 21 </ div > 22 < input type ="button" id ="start" onclick ="startTask();return false;" value ="Start the Time Consuming Task!" /> 23 < div id ="output" ></ div > 最后是一段JavaScript启动那个较长时间才能完成的Web Service并让ProgressBar控件开始工作:
截图和下载
现在所有的事情都搞定了,可以运行了!
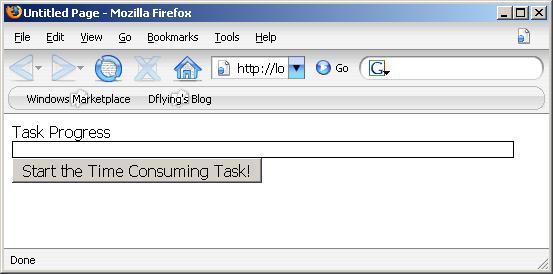
页面初始化:
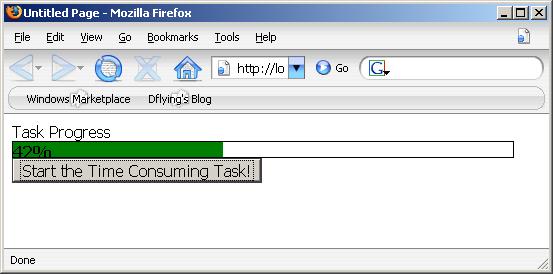
运行中:
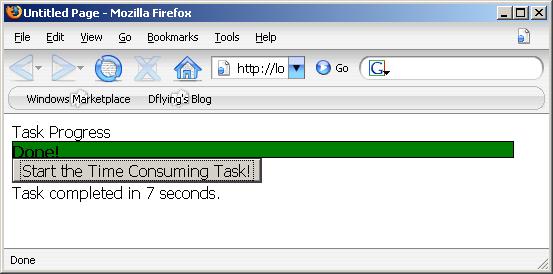
运行完成:
示例程序以及源文件可以。